Your cart is currently empty!
In our previous oil painting tutorials, we guided beginners through the basics of painting flowers and sunsets with joy and ease. But after putting the final touch on your canvas, one essential question remains: how do you clean your oil paintbrushes properly so they remain soft, functional, and ready for the next masterpiece?
If you’ve ever found your brushes stiff, frayed, or permanently tinted after one session, you’re not alone. In this blog, we’ll walk you step-by-step through how to clean oil painting brushes, preserve their quality, and ensure they last for years. Let’s dive into the best brush cleaning practices for artists of all levels.
🖌️ Why Cleaning Oil Paintbrushes Matters
Oil paint doesn’t clean off with water. It contains linseed oil or other drying oils that can harden over time, damaging brush bristles if not removed completely. A clean brush ensures:
- Accurate color blending in future paintings
- Longer lifespan for your brushes
- Consistent, smooth brush strokes
🧼 Materials You’ll Need
Before you begin, gather these essentials:
- Paint thinner (e.g., odorless mineral spirits or turpentine)
- Linseed oil or brush cleaning oil
- Mild soap (like dish soap or brush cleaner)
- Warm water
- Rags or paper towels
- Glass jar or metal container
🪣 Step-by-Step: How to Clean Oil Painting Brushes
Step 1: Wipe Off Excess Paint
Use a paper towel or cloth to remove as much paint as possible from the brush immediately after use.
Step 2: Dip in Paint Thinner
Swirl your brush in a jar of odorless mineral spirits or turpentine. Gently press it against the side to help remove deep pigment.
Tip: Use two jars — one for the initial rinse and one for a cleaner second rinse.
Step 3: Condition with Oil
After cleaning with thinner, dip your brush into linseed oil or brush conditioning oil to rehydrate and protect the bristles.
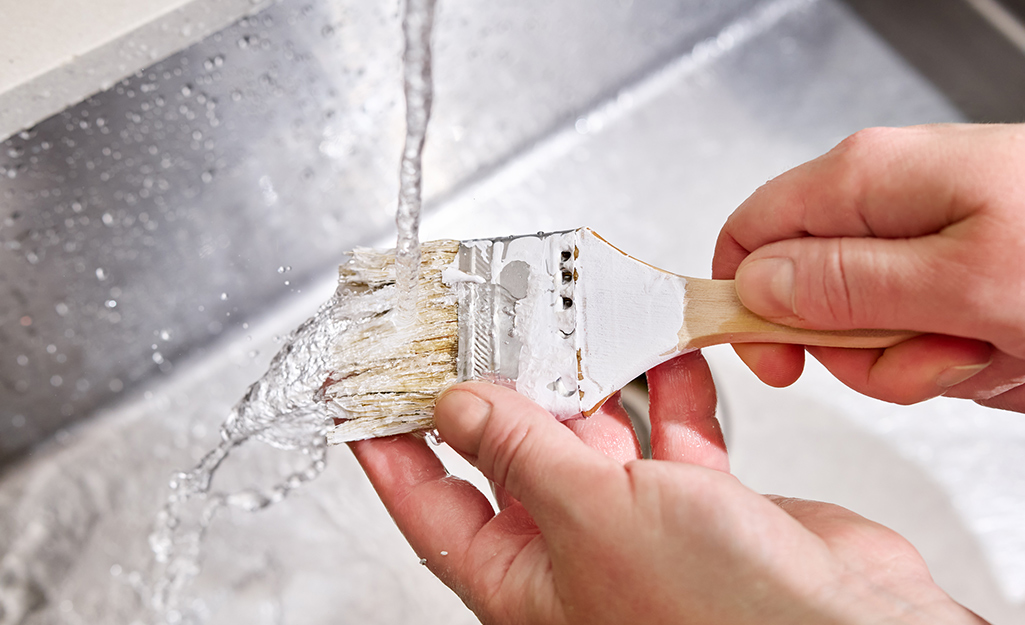
Step 4: Wash with Soap and Water
Rinse your brush with warm water and mild soap, lathering until the suds are clean. This final wash removes any remaining solvents or oils.
Recommended soaps:
- Masters Brush Cleaner
- Baby shampoo (gentle option)
Step 5: Shape and Dry Properly
Use your fingers to gently reshape the brush tip. Lay the brush flat or hang it with bristles pointing down to dry.
Never leave brushes bristle-side up in a container, as it can bend and damage the shape permanently.
🧽 Deep Cleaning Tip for Dried Oil Paint
If your brush has dried oil paint, soak it in brush restorer or Murphy’s Oil Soap for a few hours. Gently comb out the paint and repeat the cleaning steps above.
💡 Bonus Tips for Long-Term Brush Care
- Always clean brushes immediately after painting.
- Store brushes flat or upright with bristles up once fully dry.
- Use separate brushes for oil and acrylic painting to avoid cross-contamination.
- Occasionally treat bristles with conditioner or olive oil to keep them soft.
🎨 Why It Matters to Beginners
Your tools define your progress. Beginners often overlook brush maintenance, yet a well-kept brush can dramatically improve your results and reduce frustration. Whether you’re painting soft petals or radiant sunsets, your brush needs to respond to your hand like an extension of your creativity.
🖼️ Final Thoughts
Oil painting is not just about the artwork—it’s also about respecting your tools. With just a few simple habits, you can ensure that your brushes last for many sessions to come. As you continue your painting journey, don’t forget: taking care of your brush is taking care of your art.